Sometimes, small tweaks can make a big difference in enhancing user experience on websites. In this blog post, we’ll look at how to hide the cursor using JavaScript, a technique that can be useful for applications like full-screen image galleries, custom pointer effects, or specialized web experiences. This tutorial will guide you through the process step-by-step.
Approach
So, here’s the plan: we’ll build a basic webpage where the cursor disappears when you hover over the body. We’ll use some simple HTML for structure, a bit of CSS to style it up, and JavaScript to handle the cursor hiding effect. It’s pretty straightforward, and you can customize it however you like.
Let’s break it down step by step:
- HTML: We’ll create a minimal structure for our webpage, including a heading.
- CSS: We’ll add some styles to make the text look nice and create a class that hides the cursor.
- JavaScript: Finally, we’ll write some code to manage when the cursor should be hidden or shown based on mouse events.
Writing HTML & CSS
We’ll start by creating a minimal HTML file structure with some basic CSS to format the page.
Here’s the index.html code:
<!DOCTYPE html>
<html lang="en">
<head>
<meta charset="UTF-8">
<meta name="viewport" content="width=device-width, initial-scale=1.0">
<title>Hide Cursor Example</title>
<link rel="stylesheet" href="style.css">
</head>
<body>
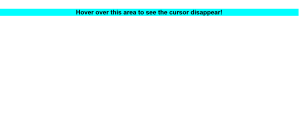
<h1 style="background-color: aqua" >Hover over this area to see the cursor disappear!</h1>
<script src="script.js"></script>
</body>
</html>
- This is a pretty basic HTML file. It starts with the <!DOCTYPE html> declaration and includes all the necessary tags.
- Inside the <head>, we link to our CSS file (style.css) so we can style the page.
- The <h1> tag is where we tell users to hover over the area to see the cursor disappear.
- At the end of the body, we include our JavaScript file (script.js) to add interactivity.
Here’s the style.css code:
body {
    font-family: Arial, sans-serif;
    text-align: center;
    margin-top: 50px;
}

.hidden-cursor {
    cursor: none; /* Hides the cursor */
}
- The CSS styles the body of the webpage:
- We set the font to Arial for a clean and readable look.
- text-align: center makes sure our heading is nicely centered on the page.
- Adding margin-top: 50px gives some space at the top for a better layout.
- The .hidden-cursor class is super important because it sets cursor: none, which is what actually hides the cursor when we apply this class.
Adding JavaScript for Cursor Hiding
Now, we’ll add JavaScript to hide the cursor when the user hovers over the body of the webpage. Here’s the script.js code:
document.body.addEventListener("mouseover", () => {
    document.body.classList.add("hidden-cursor");
});

document.body.addEventListener("mouseleave", () => {
    document.body.classList.remove("hidden-cursor");
});
- In this part, we’re adding event listeners to the body of the webpage:
- When the mouse enters the body (mouseover event), we add the .hidden-cursor class, which hides the cursor.
- When the mouse leaves the body (mouseleave event), we remove the class to bring back the cursor.
Output

Conclusion
And that’s it! We’ve built a simple webpage that hides the cursor when you hover over it. This little trick can make your site more engaging and fun for users. You can definitely play around with this and customize it to fit your own projects!
Use Cases
- Creating engaging experiences in games or interactive applications.
- Designing unique user interfaces that draw attention.
- Building educational tools where the cursor might distract users.