Introduction to Submitting HTML Forms with JavaScript
Submitting HTML forms programmatically with JavaScript can significantly enhance your website, making it more interactive and dynamic. Instead of relying on the traditional submit button, you can use JavaScript to handle form submission, offering you greater control over the process and improving the overall user experience.
Why Submit HTML Form with JavaScript?
Improved User Experience
By submitting an HTML form with JavaScript, you eliminate the need for page reloads, creating a smoother and more fluid user experience. As a result, users can interact with your website seamlessly, which is crucial for modern web applications.
Handle Form Validation
Moreover, JavaScript allows you to perform validation checks before submitting the form. This step ensures that users provide the necessary input, thereby reducing errors and enhancing data accuracy. Additionally, you can validate the form’s content in real-time, preventing submission until all fields are correctly filled.
Steps to Submit HTML Form with JavaScript
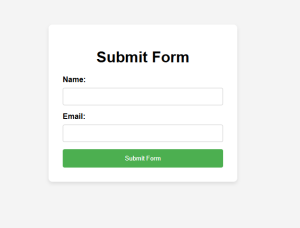
Step 1: Set Up Your HTML Form
The first step involves creating the basic HTML form, including fields like text, email, or password. You must also specify the action and method attributes, which are crucial for backend processing and form handling.
Step 2: Use JavaScript to Submit the Form
Next, write a JavaScript function to trigger the submit() method. This function ensures the form is submitted without refreshing the page, keeping the user experience uninterrupted and responsive. Therefore, the user won’t face any delays, making your website more efficient.
Step 3: Customize for Dynamic Websites
For even more advanced uses, you can combine form submission with AJAX (Asynchronous JavaScript and XML). This allows data to be sent to the server in the background, which is particularly helpful for dynamic web applications. Consequently, users won’t experience any page reloads, and your website will remain highly responsive.
http://<a href=”https://www.example.com” target=”_blank”>Visit Example Website</a>
http://<a href=”/about-us.html”>Learn more about us</a>
Conclusion
In conclusion, learning how to submit HTML forms with JavaScript offers significant advantages in web development. It gives you the flexibility to improve usability and ensures that form data is handled efficiently. By mastering this technique, you can enhance both the functionality and user experience of your website.
<!DOCTYPE html> <html lang="en"> <head> <meta charset="UTF-8"> <meta name="viewport" content="width=device-width, initial-scale=1.0"> <title>Submit Form with JavaScript</title> <style> body { font-family: Arial, sans-serif; background-color: #f4f4f4; margin: 0; padding: 0; display: flex; justify-content: center; align-items: center; height: 100vh; } .container { background-color: #fff; padding: 30px; border-radius: 8px; box-shadow: 0 4px 8px rgba(0, 0, 0, 0.1); width: 400px; box-sizing: border-box; } h1 { text-align: center; margin-bottom: 20px; } form { display: flex; flex-direction: column; } label { margin-bottom: 8px; font-weight: bold; } input { padding: 10px; margin-bottom: 15px; border: 1px solid #ccc; border-radius: 4px; } button { padding: 12px; background-color: #4CAF50; color: white; border: none; border-radius: 4px; cursor: pointer; } button:hover { background-color: #45a049; } </style> </head> <body> <div class="container"> <h1>Submit Form</h1> <form id="myForm" action="/submit" method="POST"> <label for="name">Name:</label> <input type="text" id="name" name="name" required> <label for="email">Email:</label> <input type="email" id="email" name="email" required> <button type="button" onclick="submitForm()">Submit Form</button> </form> </div> <script> function submitForm() { var form = document.getElementById('myForm'); form.submit(); } </script> </body> </html>