Positioning a Tkinter Window at a Specific Location in Python
Learn how to set the position of a Tkinter window at a specific location on the screen using Python. This guide provides a step-by-step explanation of the code needed to create a tkinter window with defined size and position. Perfect for beginners, this tutorial covers importing the Tkinter module, creating the main application window, setting the window size and position, and running the Tkinter event loop. By following this guide, you’ll be able to position your Tkinter windows precisely where you want them on your screen.
Keywords:
Tkinter, Python, GUI, window position, window size, Tkinter geometry, Tkinter window, Python GUI, Tkinter tutorial, Python Tkinter example
import tkinter as tk
This line imports the tkinter module, which provides the tools to create graphical user interfaces (GUIs) in Python. The module is aliased as tk for convenience.
root = tk.Tk()
This line creates the main window of the application by instantiating the Tk class from the tkinter module. The root variable holds the reference to this main window.
width = 400
height = 300
These lines define the dimensions of the window. The width is set to 400 pixels and the height is set to 300 pixels.
x_position = 100
y_position = 150
These lines define the position of the window on the screen. The x_position is set to 100 pixels from the left edge of the screen, and the y_position is set to 150 pixels from the top edge of the screen.
root.geometry(f"{width}x{height}+{x_position}+{y_position}")
This line sets the geometry of the window using the geometry method of the root window. The geometry method takes a string in the format "widthxheight+x_position+y_position" to specify the window’s size and position. The f"{width}x{height}+{x_position}+{y_position}" part is an f-string that inserts the values of width, height, x_position, and y_position into the string.
root.mainloop()
This line starts the Tkinter event loop, which waits for user interactions and updates the GUI accordingly. The mainloop method keeps the window open and responsive until the user closes it.
Putting it all together, here is the complete code:
import tkinter as tk

root = tk.Tk()

width = 400
height = 300

x_position = 100
y_position = 150

root.geometry(f"{width}x{height}+{x_position}+{y_position}")

root.mainloop()
Output Description:
The code creates a Tkinter window with a width of 400 pixels and a height of 300 pixels. The window’s top-left corner is positioned 100 pixels from the left edge and 150 pixels from the top edge of the screen.
1. Top-left corner
- Explanation: Set both the horizontal (
x_position) and vertical (y_position) positions to0. - Changes:
x_position = 0andy_position = 0. - import tkinter as tk
import tkinter as tk

root = tk.Tk()

width = 400
height = 300

x_position = 0
y_position = 0

root.geometry(f"{width}x{height}+{x_position}+{y_position}")

root.mainloop()
2. Top-right corner
- Explanation: Calculate the horizontal position (
x_position) by subtracting the window width from the screen width. The vertical position (y_position) remains0. - Changes:
x_position = screen_width - window_widthandy_position = 0.import tkinter as tk root = tk.Tk() width = 400 height = 300 screen_width = root.winfo_screenwidth() x_position = screen_width - width y_position = 0 root.geometry(f"{width}x{height}+{x_position}+{y_position}") root.mainloop()
3. Bottom-left corner
- Explanation: Set the horizontal position (
x_position) to0. Calculate the vertical position (y_position) by subtracting the window height from the screen height. - Changes:
x_position = 0andy_position = screen_height - window_height.import tkinter as tk root = tk.Tk() width = 400 height = 300 screen_height = root.winfo_screenheight() x_position = 0 y_position = screen_height - height root.geometry(f"{width}x{height}+{x_position}+{y_position}") root.mainloop()
4. Bottom-right corner
- Explanation: Calculate both the horizontal (
x_position) and vertical (y_position) positions by subtracting the window dimensions from the screen dimensions. - Changes:
x_position = screen_width - window_widthandy_position = screen_height - window_height.import tkinter as tk root = tk.Tk() width = 400 height = 300 screen_width = root.winfo_screenwidth() screen_height = root.winfo_screenheight() x_position = screen_width - width y_position = screen_height - height root.geometry(f"{width}x{height}+{x_position}+{y_position}") root.mainloop()
Output:
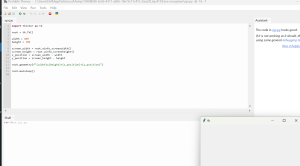
Here is the output which is executed in Thonny .
Top-left corner:

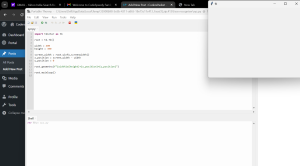
Top-right corner:
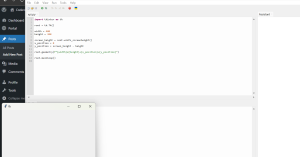
Bottom-left corner:
Bottom-right corner: