In this tutorial, we will explore how to join two images using two prominent Python libraries which are Pillow and OpenCV (cv2).
Pillow is a versatile, free, and open-source library designed for creating and manipulating digital images effortlessly. On the other hand, OpenCV (cv2) offers robust capabilities for image and video processing, making it an essential tool for various computer vision tasks.
Prerequisites:
Before diving into this tutorial, You must install the Pillow and OpenCV libraries. You can do this by running the following commands in your terminal or command prompt:
pip install pillow
pip install opencv-python
Using Pillow Library
Pillow is a powerful Python library that provides extensive support for manipulating images. It is a fork of the Python Imaging Library (PIL) and offers a user-friendly interface to handle tasks such as opening, controlling, and saving many different image file formats. Whether resizing images, applying filters, or combining multiple images into one, Pillow simplifies the process with its straightforward API.
The pillow package allows you to paste an image onto another one. The merge() function accepts a mode and a tuple of images as parameters and combines them into a single image.
Syntax for merge images:
Image.merge(mode, bands)
Here, mode specifies the format for the output image. The bands parameter is a sequence of single-band images, each representing a different band of the output image, and all bands must be of identical size.
Merging two images with Pillow
We will demonstrate this process step-by-step using examples. Let’s start by loading and displaying two images that we’ll merge.
from PIL import Image
image1 = Image.open('images/Lion1.jpeg')
image1.show()
image2 = Image.open('images/Temple1.jpeg')
image2.show()
Breakdown of the code:
- The ‘Image.open()’ function from the PIL (Pillow) library is used to open and read the image files specified by their paths.
- The ‘show()’ method is used to display the opened images in the default image viewer of the system.
Output: Image 1:Image 2:
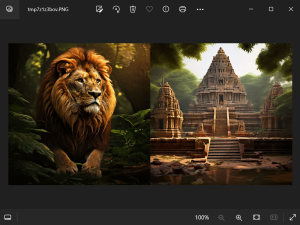
To combine Image Horizontally,
image1_size = image1.size
image2_size = image2.size
new_image = Image.new('RGB',(2*image1_size[0], image1_size[1]), (250,250,250))
new_image.paste(image1,(0,0))
new_image.paste(image2,(image1_size[0],0))
new_image.save("images/merged_image.jpg","JPEG")
new_image.show()
Breakdown of the code:
- A new blank image (‘new_image’) is created with a size that can fit both ‘image1’ and ‘image2’ side by side. The background color is set to light grey (250, 250, 250).
- The ‘paste()’ method is used to place ‘image1’ at the starting position (0, 0) and ‘image2’ right next to it, starting at the width of ‘image1’ (image1_size[0], 0).
Output:
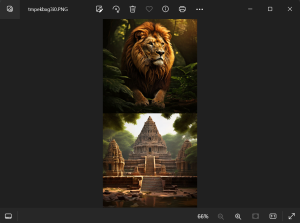
To Combine Image Vertically,
image1_size = image1.size
image2_size = image2.size
new_width = max(image1_size[0], image2_size[0])
new_height = image1_size[1] + image2_size[1]
new_image = Image.new('RGB', (new_width, new_height), (250, 250, 250))
new_image.paste(image1, (0, 0))
new_image.paste(image2, (0, image1_size[1]))
new_image.save("images/vertical_merged_image.jpg", "JPEG")
new_image.show()
Here, new image dimensions are calculated to fit both images vertically. The width is set to the maximum width of the two images, ensuring both images fit without cropping. The height is the sum of the heights of both images, allowing them to be stacked on top of each other.
Output:
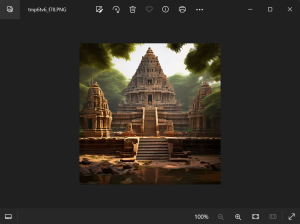
To Combine More than two images,
Multi_im = Image.new('RGB', (2*image1_size[0], 2*image2_size[1]), (250,250,250))
Multi_im.paste(image1, (0, 0))
Multi_im.paste(image2, (image1_size[0],0))  # Corrected to paste image2 correctly
Multi_im.paste(image2, (0, image2_size[1]))  # Corrected coordinates
Multi_im.paste(image1, (image1_size[0], image2_size[1]))  # Corrected coordinates
Multi_im.save("Multiple_merged_images.jpeg", "JPEG")
Multi_im.show()
Note: Here, new image (‘Multi_im’) is created with dimensions that can fit four images in a 2×2 grid. The width is twice the width of ‘image1’, and the height is twice the height of ‘image2’ .
Remember that the size of the images ‘image1’ and ‘image2’ are identical.
Output:

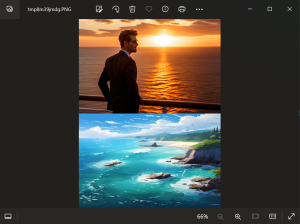
Special Case: If the Image sizes are different, you’ll need to resize them to ensure they fit together properly. Here’s how you can handle different image sizes using Pillow
from PIL import Image
image1_path = 'images/person1.jpeg'
image2_path = 'images/oceanscenery2.jpeg'
image1 = Image.open(image1_path)
image1.show()
image2 = Image.open(image2_path)
image2.show()
original_height = image2.height
original_width = image2.width
aspect_ratio = original_width / original_height
new_width = 768
new_height = int(new_width * aspect_ratio)
resized_image2 = image2.resize((new_width, new_height), Image.LANCZOS)
combined_image = Image.new('RGB', (max(original_width, new_width), original_height + new_height), (250, 250, 250))
combined_image.paste(image1, (0, 0))
combined_image.paste(resized_image2, (0, original_height))
combined_image.save("Combined_resized_image2.jpeg", "JPEG")
combined_image.show()
Key Points:
- The aspect ratio of ‘image2’ is calculated to maintain its proportions when resizing. The new width is set to 768 pixels, and the new height is computed accordingly to preserve the aspect ratio.
- A new blank image is created to hold both ‘image1’ and the resized image2 vertically. image1 is pasted at the top (0, 0), and the resized image2 is pasted below it (0, ‘original_height’), combining them into one image.
Input Images:
Image 1:Image 2:
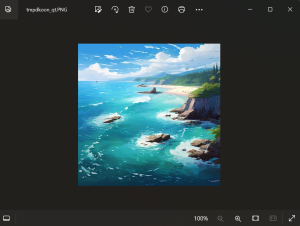
Output:
Using OpenCV(cv2)
OpenCV (Open-Source Computer Vision Library) is an open-source computer vision and machine learning software library. It provides a comprehensive set of tools for image and video processing, making it a popular choice for developers and researchers. In this section, we will explore how to merge images using OpenCV’s powerful functionalities.
We will focus on the image-merging capabilities of OpenCV, demonstrating how to combine images horizontally and vertically.
To get started with merging images using OpenCV, we’ll first import the necessary library and read the images we want to combine. Here’s how to do it:
import cv2
img1 = cv2.imread(f'images/Lion2.jpeg')
img2 = cv2.imread(f'images/Temple2.jpeg')
Here, cv2.imread() function from the OpenCV library is used to read the image files specified by their paths and load them into the variables img1 and img2.
To combine image horizontally,
im_h = cv2.hconcat([img1, img2])
cv2.imshow('Horizontal_concatenation', im_h)
cv2.imwrite('C:\\Users\\admin\\Codespeedy\\images\\Horizontal_concatenation.jpeg', im_h)
cv2.imshow('Horizontal_concatenation', im_h)
cv2.waitKey(0)
cv2.destroyAllWindows()
Breakdown of the code:
- The ‘cv2.hconcat()’ function is used to concatenate ‘img1’ and ‘img2’ horizontally, creating a single image (‘im_h’) where ‘img1’ is placed next to ‘img2’.
- The ‘cv2.imshow()’ function displays the concatenated image in a window titled ‘Horizontal_concatenation’. The ‘cv2.imwrite()’ function saves the concatenated image to the specified file path. The window will remain open until a key is pressed, after which it will close with ‘cv2.destroyAllWindows()’.
Output:

To combine image vertically,
im_v = cv2.vconcat([img1, img2])
cv2.imshow('Vertical_concatenation', im_v)
cv2.imwrite('C:\\Users\\admin\\Codespeedy\\images\\vertical_concatenation.jpeg', im_v)
cv2.imshow('Vertical_concatenation', im_v)
cv2.waitKey(0)
cv2.destroyAllWindows()
Breakdown of the code:
- The ‘cv2.vconcat()’ function is used to concatenate ‘img1’ and ‘img2’ vertically, creating a single image (‘im_v’) where ‘img1’ is placed above ‘img2’.
- The ‘cv2.imshow()’ function displays the concatenated image in a window titled ‘Vertical_concatenation’. The ‘cv2.imwrite()’ function saves the concatenated image to the specified file path. The window will remain open until a key is pressed, after which it will close with ‘cv2.destroyAllWindows().’
Output: