Adding a custom cursor to a webpage can enhance the user experience and make you site stand out. You can achieve this using HTML and JavaScript.
How to add a custom cursor on webpage using HTML, JavaScript
Here are the steps:
- Create a HTML file.
- Create a CSS file.
- Create a JavaScript file.
Step by Step breakdown:
- Include a ‘div’ element with the class ‘cursor’that will serve as your custom cursor.
- Link the CSS file for styling and the JavaScript file for functionality.
- In the CSS file, set ‘cursor:none;’ on the body to hide the default cursor.
- Style the ‘cursor’ class to define the appearance of your custom cursor.
- Use ‘position; absolute;’ to position the cursor absolutely within the document.
- ‘pointer-events: none;’ ensures that the cursor doesn’t block interactions with other elements on the page.
- Add an event listener for the ‘mousemove’ event.
- On each mouse movement, update the position of the custom cursor to follow the mouse coordinates.
<!DOCTYPE html>
<html lang="en">
<head>
<meta charset="UTF-8">
<meta name='viewport" content=width=device,initial-scale=1.0">
<title>Custom Cursor Example</title>
<style>
body
{
margin: 0;
height: 100vh;
display: flex;
justify-content: center;
align-items: center;
overflow: hidden;
cursor: none;
}
.cursor
{
width: 20px;
height: 20px;
border: 2px solid red;
border-radius: 50%;
position: absolute;
pointer-events: none;
transition: transform 0.1s ease,background-color 0.3s ease;
transform: translate(-50%,-50%);
}
.hover-target
{
width: 200px;
height: 200px;
background-color: lightblue;
display: flex;
justify-content: center;
align-items: center;
}
</style>
</head>
<body>
<div class="cursor" id="CustomCursor"></div>
<div class="hover-target">Hover over me!</div>
<script>
const cursor = document.getElementById('customCursor');
document.addEventListener('mousemove', (event) =>
{
cursor.style.left = '${event.pagex}px';
});
const hoverTarget = document.querySelector('.hover-target');
hoverTarget.addEventListener('mouseenter', () =>
{
cursor.style.backgroundColor = 'red';
});
hoverTarget.addEventListener('mouseleave', () =>
{
cursor.style.backgroundColor = 'transparent';
});
</script>
</body>
</html>
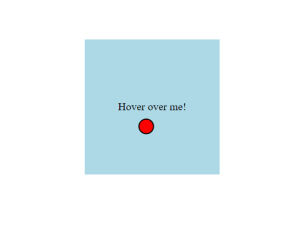
OUTPUT: