Building a CRUD Application with Next.js and MySQL
In this tutorial, we’ll walk through creating a simple CRUD (Create, Read, Update, Delete) application using Next.js and MySQL. By the end, you’ll have a working CRUD application that interacts with a MySQL database.
Prerequisites
Before we start, make sure you have the following installed:
Step 1: Setting Up the Next.js Application
First, let’s create a new Next.js application. Open your terminal and run:
npx create-next-app@latest task-crud-app
cd task-crud-app
Step 2: Installing Dependencies
We’ll need a few packages to connect to MySQL and manage our environment variables. Install them by running:
npm install mysql2 dotenv
Next, install Tailwind CSS and DaisyUI:
npm install tailwindcss@latest postcss@latest autoprefixer@latest daisyui
Initialize Tailwind CSS by creating the configuration files:
npx tailwindcss init -p
Step 3: Configuring Tailwind CSS and DaisyUI
Open the tailwind.config.js file and update it to include DaisyUI:
/** @type {import('tailwindcss').Config} */
module.exports = {
  content: [
    "./pages/**/*.{js,ts,jsx,tsx}",
    "./components/**/*.{js,ts,jsx,tsx}",
  ],
  theme: {
    extend: {},
  },
  plugins: [
    require('daisyui'),
  ],
}
Step 4: Adding Tailwind CSS to Your Project
Replace the content of your styles/globals.css file with the following to include Tailwind CSS and DaisyUI:
@tailwind base;
@tailwind components;
@tailwind utilities;
@import "daisyui";
Step 5: Setting Up MySQL
Next, we need to set up our MySQL database. Open your MySQL client and create a new database and table:
CREATE DATABASE task_crud_db;

USE task_crud_db;

CREATE TABLE tasks (
    id INT AUTO_INCREMENT PRIMARY KEY,
    title VARCHAR(255) NOT NULL,
    description TEXT,
    created_at TIMESTAMP DEFAULT CURRENT_TIMESTAMP
);
Step 6: Configuring Environment Variables
Create a .env.local file in the root of your project to store your database connection details:
DB_HOST=localhost
DB_USER=root
DB_PASSWORD=yourpassword
DB_NAME=task_crud_db
Step 7: Connecting to MySQL
Create a new file lib/db.js and add the following code to establish a connection to your MySQL database:
import mysql from 'mysql2/promise';

const connection = mysql.createPool({
  host: process.env.DB_HOST,
  user: process.env.DB_USER,
  password: process.env.DB_PASSWORD,
  database: process.env.DB_NAME,
});

export default connection;
Step 8: Creating the API Routes
Next.js API routes allow you to create endpoints to handle your CRUD operations. Create a new folder app/api/tasks and add the following files:
route.js (for fetching all tasks):
import { getConnection } from '../../../lib/db';

export async function GET(req, res) {
    const connection = await getConnection();
    const [rows] = await connection.query('SELECT * FROM tasks');
    res.status(200).json(rows);
}
create/route.js (for creating a task):
import { getConnection } from '../../../../lib/db';

export async function POST(req, res) {
    const connection = await getConnection();
    const { title, description } = await req.json();
    const [result] = await connection.query('INSERT INTO tasks (title, description) VALUES (?, ?)', [title, description]);
    res.status(201).json({ id: result.insertId, title, description });
}
update/route.js (for updating a task):
import { getConnection } from '../../../../lib/db';

export async function PUT(req, res) {
    const connection = await getConnection();
    const { id, title, description } = await req.json();
    await connection.query('UPDATE tasks SET title = ?, description = ? WHERE id = ?', [title, description, id]);
    res.status(200).json({ id, title, description });
}
delete/route.js (for deleting a task):
import { getConnection } from '../../../../lib/db';

export async function DELETE(req, res) {
    const connection = await getConnection();
    const { id } = await req.json();
    await connection.query('DELETE FROM tasks WHERE id = ?', [id]);
    res.status(204).end();
}
Step 9: Creating the Frontend
Let’s set up the frontend components for our CRUD application. We’ll create three main components: TaskList, AddTaskForm, and the main page Page.
TaskList.js
The TaskList component will display the list of tasks and provide options to update or delete each task.
export default function TaskList({ tasks, onTaskUpdated, onTaskDeleted }) {
  const handleUpdate = async (task) => {
    const updatedTitle = prompt('Update task title', task.title);
    if (updatedTitle === null) return;

    try {
      const response = await fetch('/api/tasks/update', {
        method: 'PUT',
        headers: { 'Content-Type': 'application/json' },
        body: JSON.stringify({ ...task, title: updatedTitle }),
      });
      if (response.ok) {
        onTaskUpdated();
      } else {
        console.error('Failed to update task');
      }
    } catch (error) {
      console.error('Error:', error);
    }
  };

  const handleDelete = async (id) => {
    if (!confirm('Are you sure you want to delete this task?')) return;

    try {
      const response = await fetch('/api/tasks/delete', {
        method: 'DELETE',
        headers: { 'Content-Type': 'application/json' },
        body: JSON.stringify({ id }),
      });
      if (response.ok) {
        onTaskDeleted();
      } else {
        console.error('Failed to delete task');
      }
    } catch (error) {
      console.error('Error:', error);
    }
  };

  return (
    <div className="flex flex-col">
      <div className="-m-1.5 overflow-x-auto">
        <div className="p-1.5 min-w-full inline-block align-middle">
          <div className="border rounded-lg shadow overflow-hidden dark:border-neutral-700 dark:shadow-gray-900">
            <table className="min-w-full divide-y divide-gray-200 dark:divide-neutral-700">
              <thead className="bg-gray-50 dark:bg-neutral-700">
                <tr>
                  <th scope="col" className="px-6 py-3 text-start text-xs font-medium text-gray-500 uppercase dark:text-neutral-400">Id</th>
                  <th scope="col" className="px-6 py-3 text-start text-xs font-medium text-gray-500 uppercase dark:text-neutral-400">Title</th>
                  <th scope="col" className="px-6 py-3 text-start text-xs font-medium text-gray-500 uppercase dark:text-neutral-400">Description</th>
                  <th scope="col" className="px-6 py-3 text-end text-xs font-medium text-gray-500 uppercase dark:text-neutral-400">Actions</th>
                </tr>
              </thead>
              <tbody className="divide-y divide-gray-200 dark:divide-neutral-700">
                {tasks.map((task) => (
                  <tr key={task.id}>
                    <td className="px-6 py-4 whitespace-nowrap text-sm font-medium text-gray-800 dark:text-neutral-200">{task.id}</td>
                    <td className="px-6 py-4 whitespace-nowrap text-sm text-gray-800 dark:text-neutral-200">{task.title}</td>
                    <td className="px-6 py-4 whitespace-nowrap text-sm text-gray-800 dark:text-neutral-200">{task.description}</td>
                    <td className="px-6 py-4 whitespace-nowrap text-end text-sm font-medium">
                      <button
                        onClick={() => handleUpdate(task)}
                        className="px-4 py-2 font-medium text-white bg-blue-600 rounded-md hover:bg-blue-500 focus:outline-none focus:shadow-outline-blue active:bg-blue-600 transition duration-150 ease-in-out"
                      >
                        Update
                      </button>
                      <button
                        onClick={() => handleDelete(task.id)}
                        className="ml-2 px-4 py-2 font-medium text-white bg-red-600 rounded-md hover:bg-red-500 focus:outline-none focus:shadow-outline-red active:bg-red-600 transition duration-150 ease-in-out"
                      >
                        Delete
                      </button>
                    </td>
                  </tr>
                ))}
              </tbody>
            </table>
          </div>
        </div>
      </div>
    </div>
  );
}
AddTaskForm.js
The AddTaskForm component will provide a form to add new tasks.
import { useState } from 'react';

export default function AddTaskForm({ onTaskAdded }) {
  const [title, setTitle] = useState('');
  const [description, setDescription] = useState('');

  const handleSubmit = async (event) => {
    event.preventDefault();
    try {
      const response = await fetch('/api/tasks/create', {
        method: 'POST',
        headers: { 'Content-Type': 'application/json' },
        body: JSON.stringify({ title, description }),
      });
      if (response.ok) {
        setTitle('');
        setDescription('');
        onTaskAdded();
      } else {
        console.error('Failed to add task');
      }
    } catch (error) {
      console.error('Error:', error);
    }
  };

  return (
    <div className="flex flex-row justify-center px-10 py-10">
      <div className="w-full max-w-3xl">
        <h1 className="font-bold text-2xl mb-4 text-center">Add New Task</h1>
        <div className="flex flex-col justify-center">
          <form onSubmit={handleSubmit} className="flex flex-wrap justify-center gap-4">
            <div>
              <input
                type="text"
                placeholder="Task Title"
                value={title}
                onChange={(e) => setTitle(e.target.value)}
                required
                className="input input-bordered input-accent flex-grow"
              />
            </div>
            <div>
              <input
                type="text"
                placeholder="Task Description"
                value={description}
                onChange={(e) => setDescription(e.target.value)}
                required
                className="input input-bordered input-accent flex-grow"
              />
            </div>
            <div>
              <button type="submit" className="btn btn-primary">
                Add Task
              </button>
            </div>
          </form>
        </div>
      </div>
    </div>
  );
}
Main Page (page.js)
The Page component will combine the TaskList and AddTaskForm components and manage the task state.
"use client";

import '../app/globals.css';
import { useEffect, useState } from 'react';
import AddTaskForm from './AddTaskForm';
import TaskList from './TaskList';
import Navbar from '../components/Navbar';

export default function Home() {
  const [tasks, setTasks] = useState([]);

  useEffect(() => {
    fetchTasks();
  }, []);

  async function fetchTasks() {
    try {
      const response = await fetch('/api/tasks');
      if (!response.ok) {
        throw new Error('Failed to fetch tasks');
      }
      const data = await response.json();
      setTasks(data);
    } catch (error) {
      console.error('Error fetching tasks:', error);
    }
  }

  function handleTaskAdded() {
    fetchTasks();
  }

  function handleTaskUpdated() {
    fetchTasks();
  }

  function handleTaskDeleted() {
    fetchTasks();
  }

  return (
    <div>
      <Navbar />
      <AddTaskForm onTaskAdded={handleTaskAdded} />
      <TaskList
        tasks={tasks}
        onTaskUpdated={handleTaskUpdated}
        onTaskDeleted={handleTaskDeleted}
      />
    </div>
  );
}
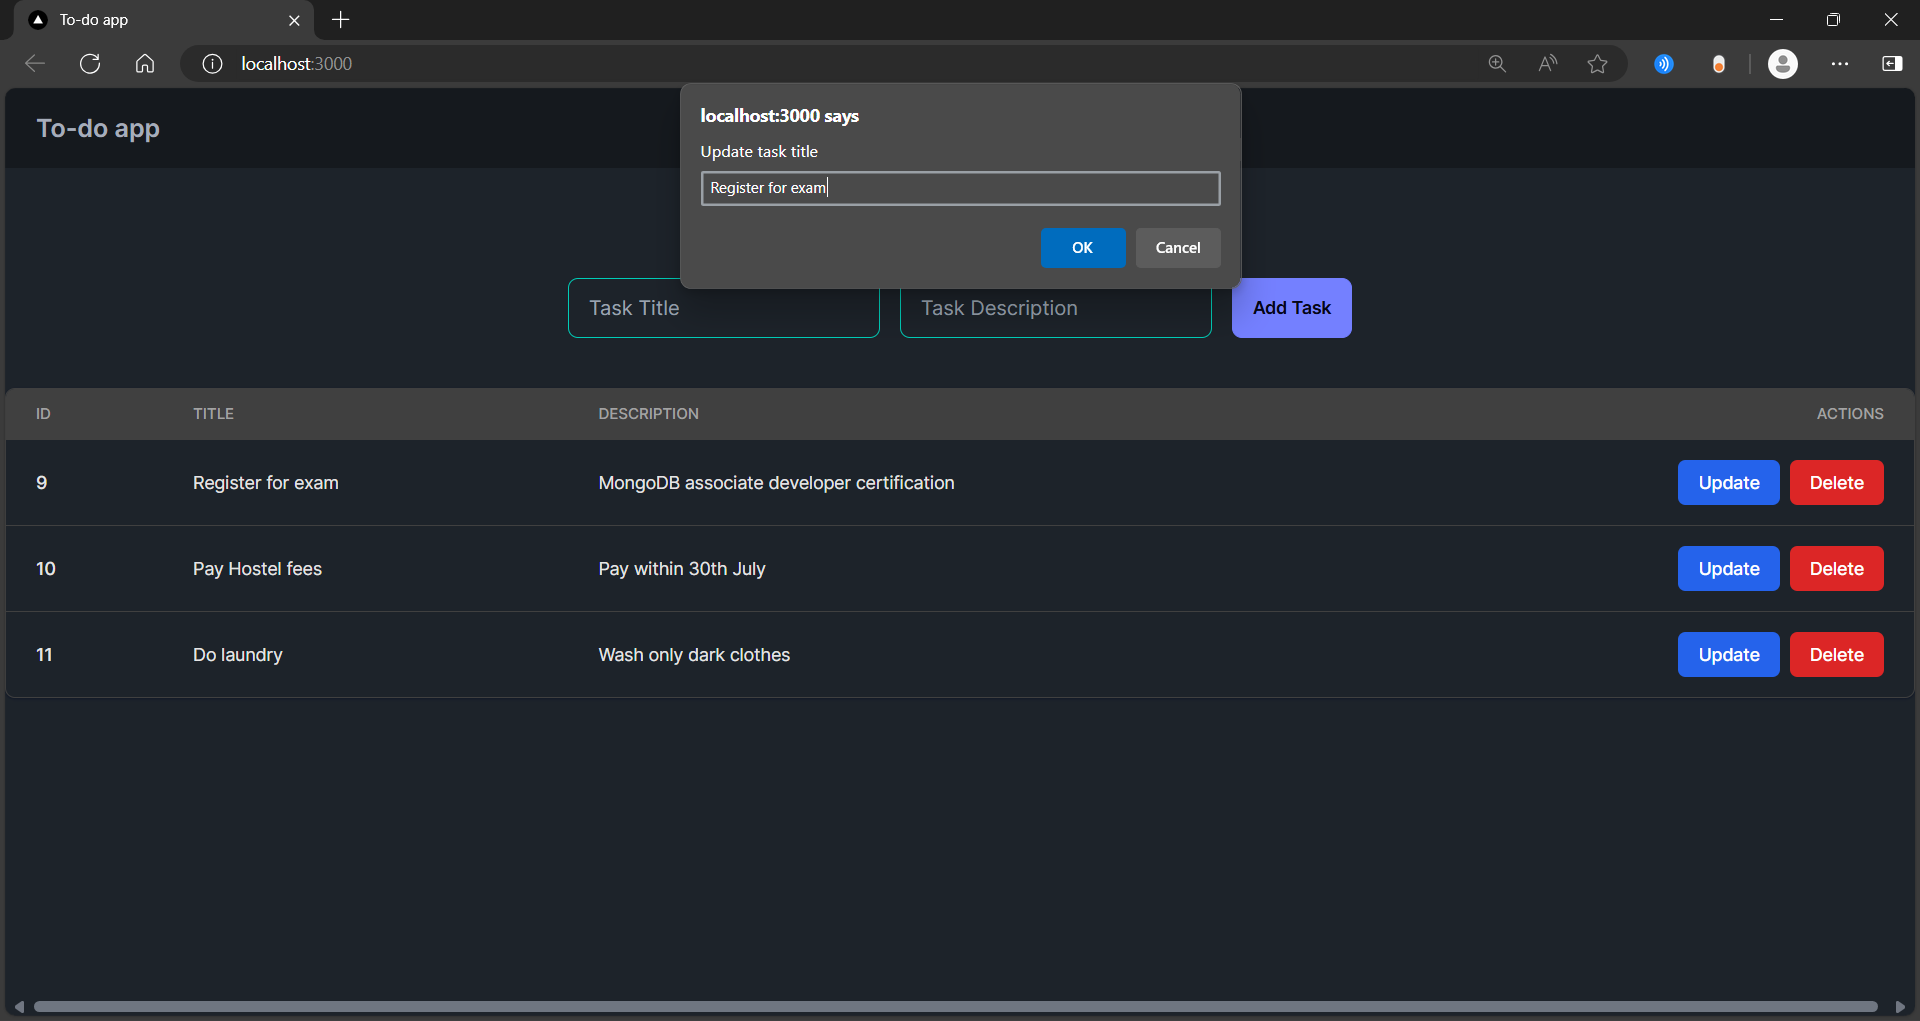
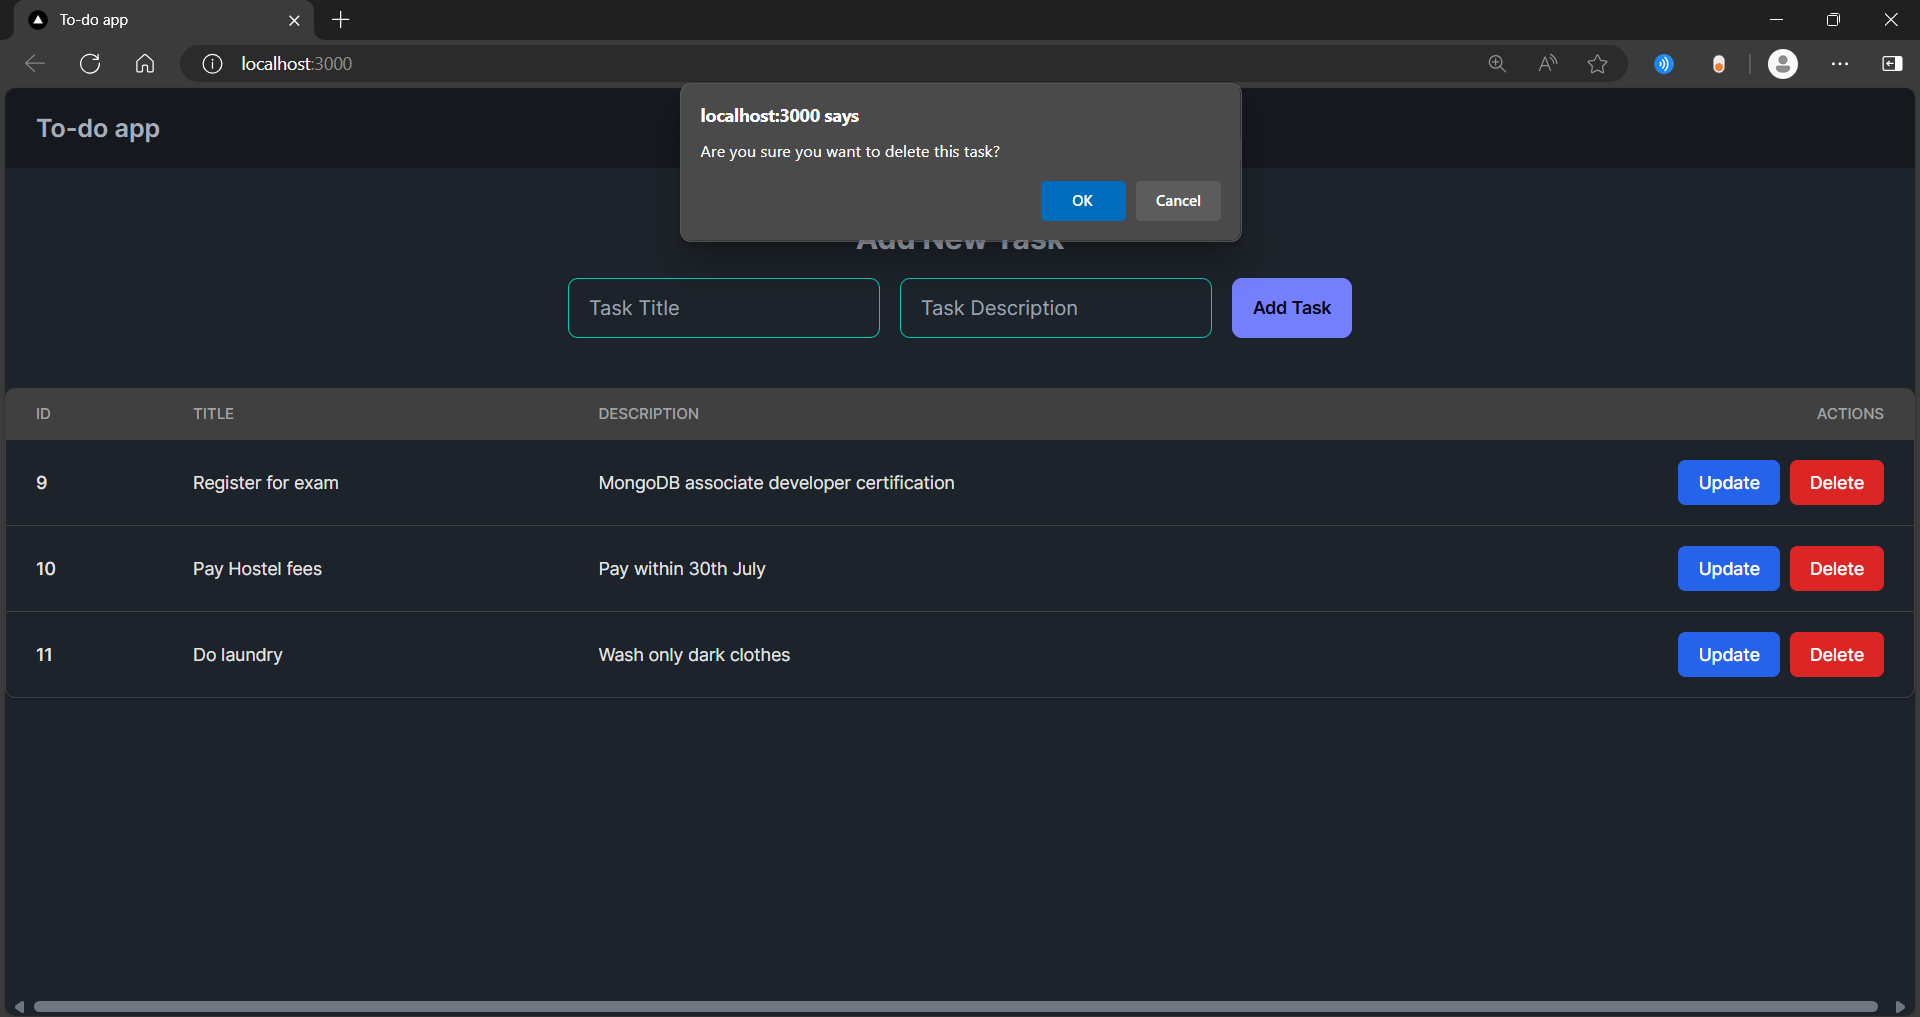
Screenshot :
Below are the Screenshot of the Output :

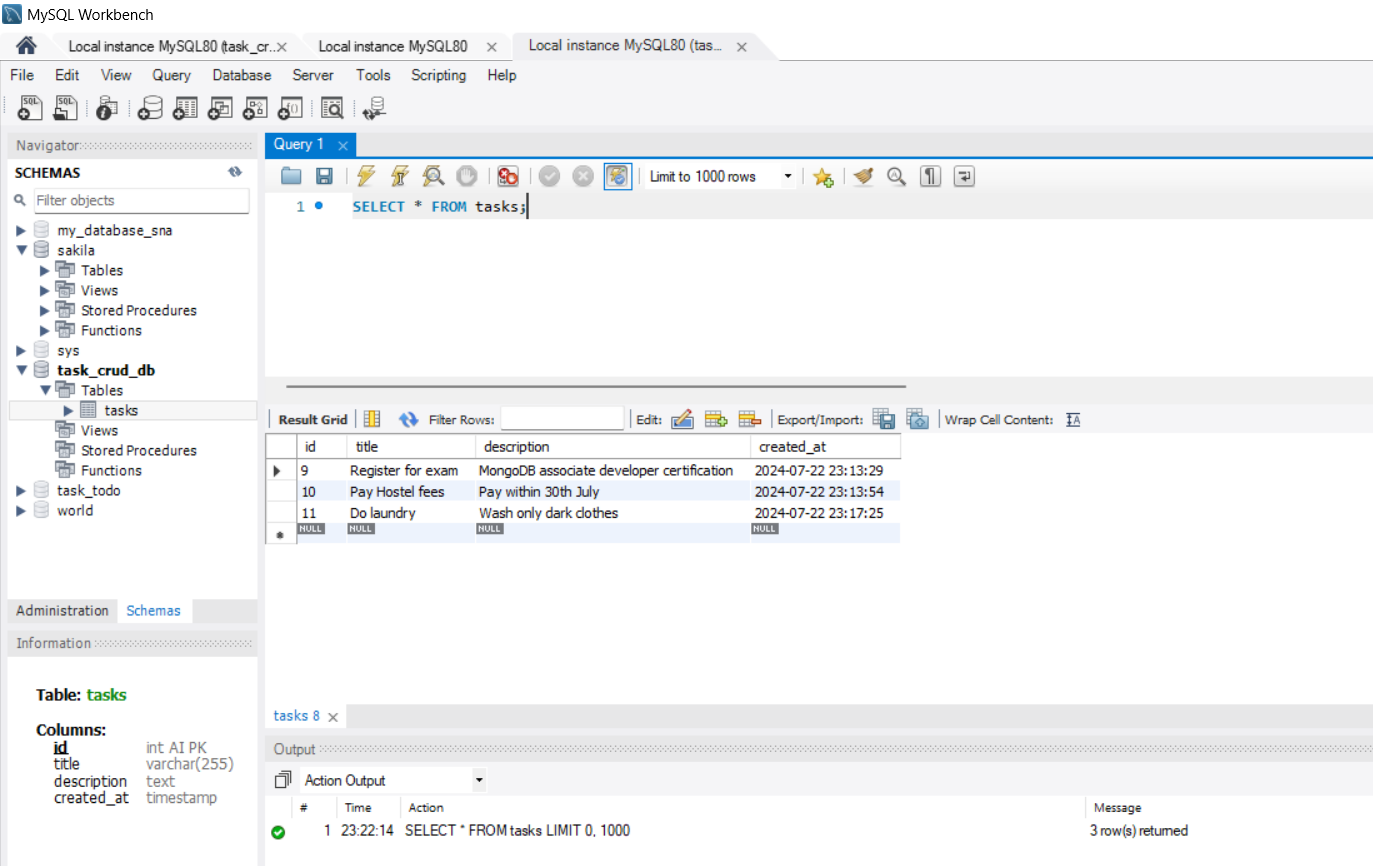
 You can also see the records in MySQL Workbench :
Conclusion
You now have a fully functional CRUD application using Next.js and MySQL. This simple application demonstrates how to perform basic CRUD operations with Next.js and MySQL.