In this tutorial ,we will learn how to create a QR code generator web application with some cool and easy example. By the end of this tutorial ,you’ll have a fully functional QR generator that you can use a various web application.
Setting up the HTML structure
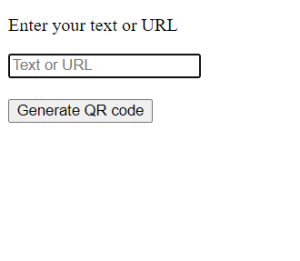
First, we create a HTML file .This file contains the title ,an input box where user can enter their text and a button for generating the QR code .
<!DOCTYPE html>
<html lang="en">
<head>
    <meta charset="UTF-8">
    <meta name="viewport" content="width=device-width, initial-scale=1.0">
    <title>QR code generator</title>
    <link rel="stylesheet" href="style.css">
</head>
<body>
        <div class="container">
            <p>Enter your text or URL</p>
            <input type="text" placeholder="Text or URL" id="text">
            <div id="box">
                <img src="" id="image">

             </div>
            <button onclick="generateQR()">Generate QR code</button>


        </div>
        <script>
            let box=document.getElementById("box");
            let image=document.getElementById("image");
            let text=document.getElementById("text");

            function generateQR(){
                image.src=" https://api.qrserver.com/v1/create-qr-code/?size=150x150&data="+ text.value;
                box.classList.add("display");
            }
        </script>
</body>
</html>
Explanation the HTML code
- <!DOCTYPE html>:Specifies that this is an HTML file .
- <html lang=”en”>:Specifies that the language of the file that is English.
- <head>:contains meta information and links to external resources.
- <meta charset=”UTF-8″>:Sets the character encoding to UTF-8.
- <meta name=”viewport” content=”width=device-width, initial-scale=1.0″>:Makes the pages responsive to different screen sizes.
-
<title>QR code generator</title>:Sets the title of the page as ‘QR code generator’.
- <link rel=”stylesheet” href=”style.css”>:links the external CSS file that is ‘style.css’.
- <body>:Body section that contains the content of web page.
- <div class=”container”>:A container that holds all the content.
- <p>Enter your text or URL</p>:A paragraph promoting the user to enter text or a URL.
- <input type=”text” placeholder=”Text or URL” id=”text”>:A text input field where user can enter text or URL.
- <div id=”box”>:A container for the QR code image.
- <img src=”” id=”image”>:An image element where the QR code will be displayed.
- <button onclick=”generateQR()”>Generate QR code</button>: A button that triggers the QR code generation when clicked.
- <script>:This tag is used to used to embed a javascript.
- let box=document.getElementById(“box”):gets the <div> element with the ‘id’ box.
- let image=document.getElementById(“image”):gets the <img> element with the id ‘image’.
- let text=document.getElementById(“text”):gets the <input> element with the id ‘text’.
- function generateQR():A function which name is ‘generateQR()’.
- image.src=” https://api.qrserver.com/v1/create-qr-code/?size=150×150&data=”+ text.value: Sets the ‘src’ attribute of the image to a URL that generate QR code based on the text or URL.
- box.classList.add(“display”):Adds a CSS class ‘display’ to the ‘box’element.
Output:
Adding CSS styles
*{
 margin:0;
 padding:0;
 font-family:'poppins',sans-serif;
 box-sizing: border-box;

}
body{
    background: #afeeee;
}
.container{
    width: 300px;
    padding: 30px 40px;
    position: absolute;
    top: 50%;
    left: 50%;
    transform: translate(-50%,-50%);
    background: #fff;
    border-radius: 10px;

}
.container p{
    font-weight:600;
    font-size: 15px;
    margin-bottom: 8px;
}
.container input{
    width:100%;
    height: 50px;
    border:1px solid #000000;
    outline: 0;
    padding:10px;
    margin:10px 020;
    border-radius: 5px;
}
.container button{
    width:100%;
    height: 50px;
    background:#494eea ;
    color: #fff;
    border:0;
    outline: 0;
    border-radius: 5px;
    box-shadow: 0 10px 10px rgba(0,0,0,0.1);
    cursor:pointer;
    margin:20px 0;
    font-weight: 500;
}
#box{
    width: 200px;
    border-radius: 5px;
    /*transition: max-height 1s;*/
}

#box img{
    width: 100%;
    padding: 10px;
}

#box.display{
    max-height: 300px;
    margin: 10px auto;
    border: 1px solid #000;
}
Explanation the CSS code
- ‘*’ Selector:
- Resets margin and padding for all elements to zero.
- Applies the ‘Poppins’ font across the site.
- Ensures consistent box-sizing across all elements.
- ‘body’:
- Sets the background color to a light blue.
- ‘.container’:
- set the width of the container to 300px and adds padding inside.
- uses absolute positioning to center the container both vertically and horizontally using ‘top :50%’ ,’left :50%’ and ‘transform: translate (-50%,-50%)’.
- Gives the container a white background and round corners.
- ‘.container p’:
- sets the font weight to 600.
- Sets the font size to 15PX.
- Add the margin at the bottom for spacing.
- ‘.container input’:
- Makes the input field full width(100%) and gives it a height of 50PX.
- Adds a solid black border and no outline when focused.
- Add padding inside for spacing and rounds the corners.
- uses ‘margin:10px 0 20 px;’ for spacing around the input(10px on top ,0 on the sides and 20px on the bottom).
- ‘.container button’:
- Makes the input field full width(100%) and gives it a height of 50PX.
- Background color is set to a dark blue with white text.
- No border or outline and round corners.
- Adds a shadow beneath the button for depth.
- Changes the cursor to a pointer when hovered over and adds the margin above the button.
- ‘#box’:
- Sets the width to 200 px and rounds the corners.
- ‘#box img’:
- Makes the image fill the container’s width.
- Adds padding inside the box for spacing.
- ‘#box.display’:
- Adds a transition effect by controlling the maximum height.
- centers the image inside the box and adds a border around it when the class ‘display’ is added.
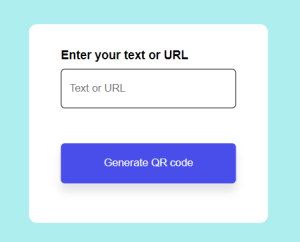
Output:
Test the program
- Save the file: Ensures all files(index.html,style.css) are saved in the same directory.
- Open HTML file: Open the ‘index.html’ in a web browser.
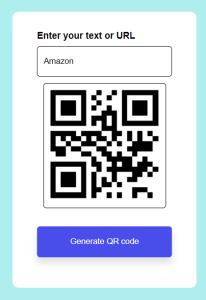
- Test functionality: Enter the text or a URL into the input field. Click on the ‘generate QR code’ button.
Output
Conclusion
The HTML, JavaScript and CSS work together to create a functional QR code generator. The HTML structures the input fields and display area, JavaScript handle the QR code generation using an external API, and CSS styles the page with a clean, centered layout. This results in a simple ,user friendly tool for generating QR codes directly in the browser.
Have a happy and great coding!