This tutorial will walk you through the steps to create a simple text-to-QR code generator using JavaScript. Whether you’re a web development enthusiast or looking to integrate QR code functionality into your application, this guide will help you get started.
Step 1: Setting Up the HTML Structure
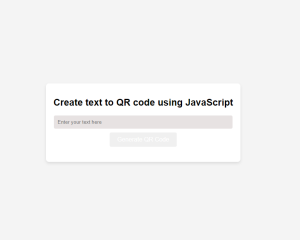
First, create an HTML file that will serve as the foundation for our QR code generator. This file will include an input field for users to enter the text they want to convert to a QR code, a button to trigger the QR code generation, and a container to display the generated QR code.
<!DOCTYPE html>
<html lang="en">
<head>
    <meta charset="UTF-8">
    <meta name="viewport" content="width=device-width,
 initial-scale=1.0">
    <title>Create text to QR code using JavaScript</title>
    <link rel="stylesheet" href="style.css">
    <script        src="https://cdnjs.cloudflare.com/ajax/libs/qrcodejs/1.0.0/qrcode.min.js"></script>
</head>
<body>
    <div class="container">
    <h1>Create text to QR code using JavaScript</h1>
    <input type="text" id="text" placeholder="Enter your text here">
    <button onclick="generateTextToQRCode()">Generate QR Code</button>
    <div id="qrcode"></div>
</div>

    <script src="script.js"></script>
</body>
</html>
Explanation
- DOCTYPE Declaration: Defines the document type and HTML version.
- <html lang=”en”>: Specifies the language of the document as English.
- <head>: Contains meta-information about the HTML document.
- <meta charset=”UTF-8″>: Sets the character encoding to UTF-8.
- <meta name=”viewport” content=”width=device-width, initial-scale=1.0″>: Ensures the page is responsive, scaling correctly on different devices.
- <title>Create text to QR code using JavaScript</title>: Sets the title of the web page as “Create text to QR code using JavaScript”.
- <link rel=”stylesheet” href=”style.css”>: Links an external CSS file for styling the page.
- <script src=”https://cdnjs.cloudflare.com/ajax/libs/qrcodejs/1.0.0/qrcode.min.js”></script>: Includes the
qrcodejslibrary from a CDN to generate QR codes. - <body>: Contains the main content of the web page.
- <div class=”container”>: A container div that holds the content elements.
- <h1>Create text to QR code using JavaScript</h1>: A heading element that displays the title “Create text to QR code using JavaScript”.
- <input type=”text” id=”text” placeholder=”Enter text here”>: An input field where users can enter text to be converted into a QR code.
- <button onclick=”generateTextToQRCode()”>Generate QR Code</button>: A button that triggers the
generateTextToQRCodefunction when clicked. - <div id=”qrcode”></div>: A div element that will display the generated QR code.
- <script src=”script.js”></script>: Links an external JavaScript file that contains the code to handle QR code generation.
Step 2: Adding CSS Styles
To make our QR code generator visually appealing and user-friendly, we’ll add some CSS styles. Create a style.css file and add the following styles:
body{
    font-family: Arial, sans-serif;
    background-color: #f4f4f4;
    display: flex;
    justify-content: center;
    align-items: center;
    height: 100vh;
    margin: 0;
}

h1{
    font-size: 25px;
    margin-bottom: 20px;
}

.container{
    background: white;
    padding: 20px;
    text-align: center;
    border-radius: 8px;
    padding: 20px;
    display: flex;
    flex-direction: column;
    align-items: center;
    box-shadow: 0 4px 8px rgba(0, 0, 0,0.1);
}

input[type="text"]{
   width: calc(100% - 22px);
   padding: 10px;
   background-color: rgb(231, 226, 226);
   border: none;
   border-radius: 4px;
   cursor: pointer;
}

button{
    padding: 10px 20px;
    font-size: 16px;
    color: white;
    background-color: 007bff;
    border: none;
    border-radius: 4px;
    cursor: pointer;
    margin-top: 10px;

}

button:hover{
    background-color: black;
}

#qrcode{
    margin-top: 20px;
}
Explanation:
body {
    font-family: Arial, sans-serif;
    background-color: #f4f4f4;
    display: flex;
    justify-content: center;
    align-items: center;
    height: 100vh;
    margin: 0;
}
- Sets the font family to Arial or sans-serif.
- Applies a light gray background color (
#f4f4f4). - Uses Flexbox to center content both horizontally and vertically.
- Sets the height of the viewport to 100%.
- Removes default body margin.
h1 {
    font-size: 25px;
    margin-bottom: 20px;
}
- Sets the font size of the heading to 25 pixels.
- Adds a bottom margin of 20 pixels.
.container {
    background: white;
    padding: 20px;
    text-align: center;
    border-radius: 8px;
    display: flex;
    flex-direction: column;
    align-items: center;
    box-shadow: 0 4px 8px rgba(0, 0, 0, 0.1);
}
- Sets the background color to white.
- Applies 20 pixels of padding.
- Centers text within the container.
- Rounds the container’s corners with an 8-pixel radius.
- Uses Flexbox to arrange children in a column and center them.
- Adds a subtle shadow effect around the container.
input[type="text"] {
    width: calc(100% - 22px);
    padding: 10px;
    background-color: rgb(231, 226, 226);
    border: none;
    border-radius: 4px;
    cursor: pointer;
}
- Sets the width of the input field to the full width of the container minus 22 pixels.
- Applies 10 pixels of padding.
- Sets a light gray background color.
- Removes the border.
- Rounds the corners of the input field.
- Changes the cursor to a pointer on hover.
button {
    padding: 10px 20px;
    font-size: 16px;
    color: white;
    background-color: #007bff;
    border: none;
    border-radius: 4px;
    cursor: pointer;
    margin-top: 10px;
}
- Sets padding to 10 pixels vertically and 20 pixels horizontally.
- Sets the font size to 16 pixels.
- Changes the text color to white.
- Sets the background color to blue (
#007bff). - Removes the border.
- Rounds the corners of the button.
- Changes the cursor to a pointer on hover.
- Adds a top margin of 10 pixels.
button:hover {
    background-color: black;
}
- Changes the background color to black when the button is hovered over.
#qrcode {
    margin-top: 20px;
}
- Adds a top margin of 20 pixels to the QR code container.
Step 3: Implementing the JavaScript Functionality
Now, let’s add the JavaScript code that will generate the QR code. Create a script.js file and add the following code:
function generateTextToQRCode(){
    //get the text from the input field
    const text = document.getElementById('text').value;

    //clear any previous QR code
    const qrcodeContainer = document.getElementById('qrcode');
    qrcodeContainer.innerHTML = "";

    //Generate the new QR code
    new QRCode(qrcodeContainer, {
          text : text,
          width :256,
          height :256,
    });
}
Explanation:
- Retrieve Input Value: The line
const text = document.getElementById('text').value;captures the text entered by the user in the input field. - Clear Previous QR Code:
qrcodeContainer.innerHTML = "";clears any existing QR code from the container. - Generate New QR Code: The
QRCodeconstructor creates a new QR code in the specified container (qrcodeContainer) with the provided text, width, and height.
Step 4: Test Your Program
- Save Files: Ensure all three files (
index.html,style.css,script.js) are saved in the same directory. - Open HTML File: Open
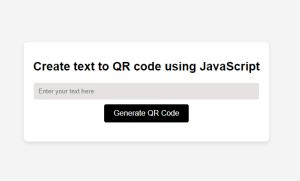
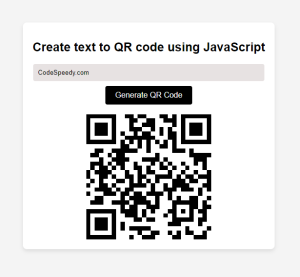
index.htmlin a web browser or use a live server. - Test Functionality: Enter text into the input field. Click the “Generate QR Code” button. Verify that the QR code corresponding to the entered text is displayed below the button.
Output
Conclusion
By following these steps, you can create a simple yet effective text-to-QR code generator using JavaScript. This functionality can be integrated into various applications, from personal websites to professional projects, providing a quick and efficient way to share information.
Feel free to customize the styles and extend the functionality as needed.
Happy coding!