In modern web development, interactive applications often require responding to user inputs through keyboard events. One common interaction is detecting arrow key presses, which can be used for navigation, gameplay, and much more. In this blog post, we’ll walk through how to detect arrow key presses in JavaScript and implement a user-friendly interface that changes the color of buttons based on the pressed keys.
Why Detect Arrow Keys?
Detecting arrow keys is essential for creating intuitive and responsive web applications. By listening for key events, we can enhance user experience by allowing keyboard shortcuts for navigation or control.
Project Overview
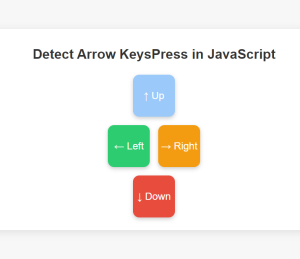
In this example, we will create a simple web application with four buttons: Up, Down, Left, and Right. Each button will change color when its corresponding arrow key is pressed. This interactive feature provides a visual representation of keyboard input.
Setting Up the Project
- Create Your Project Files: Start by creating a folder for your project. Inside this folder, create three files:
index.htmlstyle.cssscript.js
- Open Your Project in a Code Editor: We recommend using Visual Studio Code for its robust features.
Step 1: Create the HTML Structure
Let’s start by defining the HTML structure. Open index.html and add the following code:
<!DOCTYPE html>
<html lang="en">
<head>
    <meta charset="UTF-8">
    <meta name="viewport" content="width=device-width, initial-scale=1.0">
    <title>Arrow Key Color Changer</title>
    <link rel="stylesheet" href="style.css"> <!-- Link to CSS file -->
    <script defer src="script.js"></script> <!-- Link to JS file -->
</head>
<body>
    <div class="container">
        <h1>Detect Arrow KeysPress in JavaScript</h1>
        <div id="button-container">
            <button id="up">↑ Up</button>
            <div class="row">
                <button id="left">← Left</button>
                <button id="right">→ Right</button>
            </div>
            <button id="down">↓ Down</button>
        </div>
    </div>
</body>
</html>
Explanation:
- We have a main container holding a heading and a set of buttons.
- The buttons represent the four arrow keys.
Step 2: Style the Application
Next, let’s add some CSS to make our application visually appealing. Open style.css and add the following code:
body {
    display: flex;
    flex-direction: column;
    align-items: center;
    justify-content: center;
    height: 100vh;
    margin: 0;
    font-family: 'Arial', sans-serif;
    background-color: #f7f7f7; /* Light background for contrast */
}

.container {
    text-align: center;
    padding: 20px;
    border-radius: 15px;
    box-shadow: 0 4px 20px rgba(0, 0, 0, 0.1);
    background-color: white;
}

h1 {
    color: #333;
    margin-bottom: 20px;
}

#button-container {
    display: flex;
    flex-direction: column;
    align-items: center;
}

.row {
    display: flex;
    justify-content: center;
}

button {
    width: 100px;
    height: 100px; /* Larger button size for better interaction */
    margin: 10px;
    font-size: 24px;
    color: white;
    border: none;
    border-radius: 15px;
    cursor: pointer;
    transition: background-color 0.3s, transform 0.2s;
    background-color: #3498db; /* Default color */
    box-shadow: 0 4px 10px rgba(0, 0, 0, 0.2);
}

button:hover {
    transform: scale(1.1); /* Slightly increase size on hover */
    opacity: 0.9; /* Add hover effect */
}

button:active {
    transform: scale(0.95); /* Slightly decrease size on click */
}

/* Specific colors for each button */
#up { background-color: #3498db; }
#down { background-color: #e74c3c; }
#left { background-color: #2ecc71; }
#right { background-color: #f39c12; }
Explanation:
- We have used flexbox for layout, ensuring everything is centered and responsive.
- Each button has a hover effect and shadows for better interactivity.
Step 3: Add JavaScript Logic
Finally, we will write the JavaScript code to handle the key press events. Open script.js and add the following code:
// Function to change button color
function changeButtonColor(buttonId, color) {
    const button = document.getElementById(buttonId);
    button.style.backgroundColor = color;
}

// Reset all button colors to default
function resetButtonColors() {
    const buttons = document.querySelectorAll('#button-container button');
    buttons.forEach(button => {
        button.style.backgroundColor = ''; // Reset to original color
    });
}

// Event listener for keydown events
document.addEventListener('keydown', function(event) {
    resetButtonColors(); // Reset button colors before changing

    switch (event.key) {
        case 'ArrowUp':
            changeButtonColor('up', '#9bc9f9'); // Light blue
            break;
        case 'ArrowDown':
            changeButtonColor('down', '#ff7f7f'); // Light red
            break;
        case 'ArrowLeft':
            changeButtonColor('left', '#a2e9a2'); // Light green
            break;
        case 'ArrowRight':
            changeButtonColor('right', '#fce24b'); // Light yellow
            break;
        default:
            return; // Exit this handler for other keys
    }

    event.preventDefault(); // Prevent default action (optional)
});
Explanation:
- The JavaScript code listens for keydown events on the document.
- When an arrow key is pressed, it changes the corresponding button’s color and resets the others.
Output
Conclusion
In this tutorial, we explored how to detect arrow key presses in JavaScript and create an interactive user interface that responds to these inputs. By building a simple web application with buttons that change color based on the arrow keys pressed, we not only learned about handling keyboard events but also enhanced our understanding of JavaScript and CSS for improved user experience.
This project demonstrates the potential for creating engaging and responsive web applications that respond intuitively to user actions. You can further extend this concept by adding more buttons, animations, or integrating it into a larger project, such as a game or a navigation system.
By applying these concepts, you can create richer user experiences on your websites. Don’t hesitate to experiment with different styles and functionalities to make this project your own!
If you have any questions, suggestions, or would like to share your adaptations of this project, feel free to leave a comment below. Happy coding!