Now we’ll explore how Canny Edge Detection works and implement it using Python with OpenCV.Edge detection is a fundamental technique in image processing and Computer Vision, used to identify the boundaries of objects within an image. Canny Edge Detection stands out as one of the most robust and widely used techniques among the various edge detection methods. Developed by John F. Canny in 1986, this algorithm is known for its accuracy and ability to reduce noise while detecting edges.
What is Canny Edge Detection?
Canny Edge Detection is a multi-step algorithm designed to detect image edges while minimizing errors and noise. It is widely used because of its ability to provide accurate edge localization and its robustness against noise. The algorithm follows these key steps:
-
Noise Reduction: Smooth the image using a Gaussian filter to reduce noise.
-
Gradient Calculation: Compute the intensity gradients of the image to identify areas with significant intensity changes.
-
Non-Maximum Suppression: Thin out the edges by suppressing non-maximum gradient values.
-
Double Thresholding: Classify edges into strong, weak, or non-edges based on intensity.
-
Edge Tracking by Hysteresis: Finalize edge detection by connecting weak edges to strong ones if they are part of a continuous edge.
Why Use Canny Edge Detection?
Canny Edge Detection offers several advantages:
-
Accurate Localization: Detects edges precisely along object boundaries.
-
Noise Reduction: Minimizes false detections caused by noise through Gaussian smoothing.
-
Single Response per Edge: Ensures that each edge is marked only once.
Step-by-Step Implementation in Python
Let’s implement Canny Edge Detection using OpenCV with a simple example.
1. Install OpenCV
If you don’t have OpenCV installed, you can install it using pip:
pip install opencv-python
2. Import Libraries
Start by importing the necessary libraries:
import cv2
import matplotlib.pyplot as plt
3. Load and Display the Image
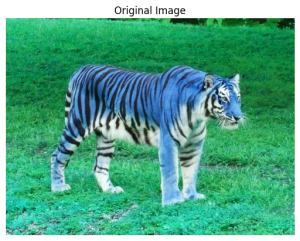
Read an image and display it using Matplotlib:
Add image at “example.jpg”
#Add image
# Load the image
image = cv2.imread('example.jpg', cv2.IMREAD_COLOR)

# Display the original image
plt.imshow(image)
plt.title('Original Image')
plt.axis('off')
plt.show()
Output:
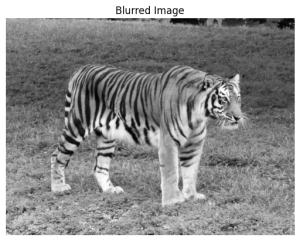
4. Apply Gaussian Blur
Reduce noise in the image by applying a Gaussian blur:
# Apply Gaussian Blur to smooth the image
blurred_image = cv2.GaussianBlur(image, (5, 5), 0)

gray_blurred_image = cv2.cvtColor(blurred_image, cv2.COLOR_BGR2GRAY)

# Display the blurred image
plt.imshow(gray_blurred_image, cmap='gray')
plt.title('Gray Image')
plt.axis('off')
plt.show()
Output:
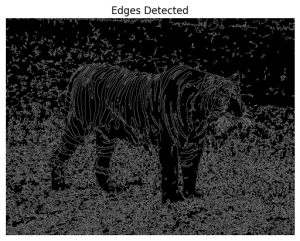
5. Perform Canny Edge Detection
Use OpenCV’s cv2.Canny() function to detect edges:
# Apply Canny Edge Detection
edges = cv2.Canny(blurred_image, threshold1=50, threshold2=150)

# Display the edges
plt.imshow(edges, cmap='gray')
plt.title('Edges Detected')
plt.axis('off')
plt.show()
Output:
Complete Code Example
Here’s the full code for detecting edges in an image:
import cv2
import matplotlib.pyplot as plt

# Load the image in grayscale
image = cv2.imread('example.jpg', cv2.IMREAD_COLOR)

# Apply Gaussian Blur to reduce noise
blurred_image = cv2.GaussianBlur(image, (5, 5), 0)

# Apply Canny Edge Detection
edges = cv2.Canny(blurred_image, threshold1=50, threshold2=150)

# Display results
plt.figure(figsize=(10, 5))

# Original Image
plt.subplot(1, 3, 1)
plt.imshow(image, cmap='gray')
plt.title('Original Image')
plt.axis('off')

# Blurred Image
plt.subplot(1, 3, 2)
plt.imshow(blurred_image, cmap='gray')
plt.title('Blurred Image')
plt.axis('off')

# Edges Detected
plt.subplot(1, 3, 3)
plt.imshow(edges, cmap='gray')
plt.title('Edges Detected')
plt.axis('off')

plt.tight_layout()
plt.show()
Conclusion
Canny Edge Detection is a powerful tool for identifying object boundaries in images. Its multi-step process ensures accurate and reliable results while handling noise effectively. By combining simplicity with robust performance, it has become a go-to algorithm for edge detection in Computer Vision tasks.