JPG to PDF converter
The JPG to PDF converter is a lightweight, user-friendly platform designed to help users convert their JPG images into PDF documents seamlessly. This project aims to bridge the gap between individual image files and organized PDF documents, providing an intuitive and efficient solution for users who need to compile images into a standardized format.
Key Features
- Drag-and-Drop Upload: Simplifies the process of uploading images.
- Multiple File Support: Allows users to upload and convert multiple JPG files at once.
- PDF Customization: Automatically adjusts page dimensions to fit the images.
- Fast and Secure: Ensures quick conversion without compromising data privacy.
Use Cases
- Students and Professionals: For creating PDF documents from scanned assignments or reports.
- Photographers and Designers: To compile image portfolios.
- General Users: For anyone needing a quick solution to organize images into PDFs.
Pre-requisites
- Basic HTML CSS JavaScript concepts and Express.js .
- An IDE ( Visual Studio Code, or any of your choice that supports web development )
- Node.js installed on your system.
Folder Structure setup for JPG to PDF converter
- Create a root folder named
JPG-to-PDF - Inside the root folder create two folders named:
publicanduploads - create a file named :
app.js
Procedure for creating JPG to PDF web app( Node.js with Express )
Step 1 : Install the dependencies.
If using VS Code then open your terminal by pressing Ctrl+` (the button under esc button) .
In the terminal run the following commands.
npm init -y
This command is used to quickly create a default package.json file in a Node.js project without going through the interactive prompts that npm init usually presents.
npm install express multer pdf-lib fs path
This command will install the dependencies required in our project .
Step 2 : Backend Setup
Create a file named app.js .
const express = require('express');
const multer = require('multer');
const { PDFDocument } = require('pdf-lib');
const fs = require('fs');
const path = require('path');

const app = express();
const upload = multer({ dest: 'uploads/' });

app.use(express.static('public'));

// Endpoint to handle file upload and conversion
app.post('/convert', upload.array('images'), async (req, res) => {
    try {
        const pdfDoc = await PDFDocument.create();

        for (const file of req.files) {
            const imageBytes = fs.readFileSync(file.path);
            const image = await pdfDoc.embedJpg(imageBytes);

            const page = pdfDoc.addPage([image.width, image.height]);
            page.drawImage(image, { x: 0, y: 0, width: image.width, height: image.height });

            fs.unlinkSync(file.path); // Clean up uploaded files
        }

        const pdfBytes = await pdfDoc.save();
        const pdfPath = path.join(__dirname, `converted_${Date.now()}.pdf`);
        fs.writeFileSync(pdfPath, pdfBytes);

        res.download(pdfPath, 'converted.pdf', () => {
            fs.unlinkSync(pdfPath); // Clean up the generated PDF file
        });
    } catch (error) {
        console.error(error);
        res.status(500).send('An error occurred during the conversion.');
    }
});

// Start the server
app.listen(3000, () => {
    console.log('Server running at http://localhost:3000');
});
The code will establish a file upload and conversion service using Express, Multer, and the pdf-lib library. It will initialize an Express application and configure Multer to store uploaded files in a designated uploads/ directory. When the /convert endpoint is accessed via a POST request, the server will process uploaded images, embedding them into a dynamically created PDF using pdf-lib . For each uploaded file, it will read the image data, embed it as a page in the PDF, and remove the temporary uploaded file from the server. Once all files are processed, it will save the resulting PDF to the file system with a unique name, send the PDF to the client for download, and then delete the generated PDF file after download completion. The server will run on port 3000, hosting a static public directory for client-side resources.
Step 3 : Frontend Setup
Create a file named index.html inside the public folder
<!DOCTYPE html>
<html lang="en">
<head>
    <meta charset="UTF-8">
    <meta name="viewport" content="width=device-width, initial-scale=1.0">
    <title>JPG to PDF Converter</title>
    <link rel="stylesheet" href="styles.css">
</head>
<body>
    <h1>JPG to PDF Converter</h1>
    <form id="uploadForm" enctype="multipart/form-data">
        <input type="file" id="fileInput" name="images" multiple accept="image/jpeg">
        <button type="submit">Convert to PDF</button>
    </form>
    <p id="message"></p>
    <script src="script.js"></script>
</body>
</html>
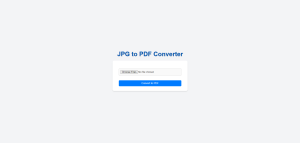
The HTML code will create a user-friendly interface for a JPG to PDF converter. It will display a title and a form where users can select multiple JPEG images using a file input field with the “accept =’jpeg/image’ ” attribute to ensure only JPEG files can be uploaded. The form will include a “Convert to PDF” button to trigger the conversion process. When users interact with the form, JavaScript logic in the linked script.js file will handle the submission and communicate with the server for file conversion. A paragraph element with the ID message will display feedback or status messages to the user, such as upload progress or errors. The page will also link to an external CSS file style.css to style the interface, ensuring an organized and visually appealing layout.
Create another file named style.css inside the public folder
body {
    font-family: 'Arial', sans-serif;
    margin: 0;
    padding: 0;
    background-color: #f3f4f6;
    color: #333;
    display: flex;
    flex-direction: column;
    justify-content: center;
    align-items: center;
    height: 100vh;
    overflow: hidden;
}

h1 {
    color: #0056b3;
    font-size: 2.5rem;
    margin-bottom: 20px;
    text-shadow: 1px 1px 2px #aaa;
}

form {
    background-color: #ffffff;
    padding: 30px 40px;
    border-radius: 10px;
    box-shadow: 0 4px 6px rgba(0, 0, 0, 0.1);
    text-align: center;
    max-width: 400px;
    width: 90%;
}

input[type="file"] {
    margin: 20px 0;
    padding: 10px;
    border: 1px solid #ccc;
    border-radius: 5px;
    width: 100%;
    box-sizing: border-box;
    background-color: #f9f9f9;
    font-size: 1rem;
    cursor: pointer;
}

button {
    background-color: #007bff;
    color: #ffffff;
    border: none;
    padding: 10px 20px;
    font-size: 1rem;
    border-radius: 5px;
    cursor: pointer;
    transition: all 0.3s ease-in-out;
    width: 100%;
    margin-top: 10px;
}

button:hover {
    background-color: #0056b3;
    transform: translateY(-2px);
}


#message {
    margin-top: 20px;
    font-size: 1rem;
    color: #333;
    font-weight: bold;
}


@media (max-width: 768px) {
    h1 {
        font-size: 2rem;
    }

    form {
        padding: 20px 30px;
    }
}
Create another file named script.js inside the public folder
const form = document.getElementById('uploadForm');
const message = document.getElementById('message');

form.addEventListener('submit', async (event) => {
    event.preventDefault();
    message.textContent = "Processing...";

    const formData = new FormData(form);

    try {
        const response = await fetch('/convert', {
            method: 'POST',
            body: formData
        });

        if (response.ok) {
            const blob = await response.blob();
            const url = window.URL.createObjectURL(blob);

            const a = document.createElement('a');
            a.href = url;
            a.download = 'converted.pdf';
            a.click();

            message.textContent = "Conversion successful! Your file is downloading.";
        } else {
            message.textContent = "An error occurred during conversion.";
        }
    } catch (error) {
        console.error(error);
        message.textContent = "An unexpected error occurred.";
    }
});
The JavaScript code will handle the form submission for the JPG to PDF conversion feature. When the user submits the form, the script will prevent the default behavior and display a “Processing…” message in the designated message element to inform the user about the ongoing operation. It will create a FormData object containing the selected image files and send it to the server’s /convert endpoint via a POST request using the Fetch API. If the server responds successfully, the code will create a downloadable link to the generated PDF using the received blob data. The browser will then automatically download the file as converted.pdf. A success message will notify the user of the completed conversion. If the server responds with an error or the network request fails, the script will display an appropriate error message and log the issue to the console.
Step 4 : Run the app
node app.js
Your JPG to PDF converter web app is ready to use !