Hello everyone, today in this tutorial you will learn how to create text to colored QR code generator web application
Steps to create the web application
Follow the following steps to create the text for the colored QR code generator
- In the first step open VS code and create a file named qrcodesite.html.
- Then in the next step, create a CSS file to add styling to the webpage named qrcodestyle.css.
- Then in the next step, create a JavaScript file named qrcode.js to add functionality to the webpage.
Steps to create the main website
Follow the following steps to create the main website for the colored QR code
- In the next step, create the boilerplate template, any website’s basic format or structure.
- In the next step, create 3 input HTML elements that take input for the text, background color, and foreground color.
- In the next step, create a canvas HTML element used to create space to generate the QR code on the webpage.
- Now in the next step, create a button HTML element named Generate colored QR code used to call function to create QR code.
- In the next step, create a script tag and add a source link i.e. https://cdnjs.cloudflare.com/ajax/libs/qrious/4.0.2/qrious.min.js
<script src="https://cdnjs.cloudflare.com/ajax/libs/qrious/4.0.2/qrious.min.js"></script>
Use the above link to access to JavaScript library function to customize the QR code by adding background and foreground color.
The above link i.e. cdnjs.cloudflare.com/ is used to get faster access to the JavaScript library.
Next, the link i.e. ajax/libs/qrious/4.0.2/ used to specify the location of the JavaScript library named qrious version 4.0.2.
Then finally the link i.e. /qrious.min.js uses this main library function to customize the QR code
The HTML file
<!DOCTYPE html>
<html lang="en">
  <head>
    <meta charset="UTF-8" />
    <meta name="viewport" content="width=device-width, initial-scale=1.0" />
    <title>Text to colored QR Code Generator</title>
    <link rel="stylesheet" href="qrcodestyle.css" />
  </head>
  <body>
    <h1 class="headingone">Welcome Everyone</h1>
    <h2 class="headingtwo">Colored QR Generator</h2>
    <div class="container">
      <p class="paraone">Enter your text</p>
      <br />
      <input type="text" id="textInput" required />
      <p class="paratwo">Enter your background color</p>
      <br />
      <input type="text" id="backgroundColor" required />
      <p class="parathree">Enter your foreground color</p>
      <br />
      <input type="text" id="foregroundColor" required /><br />
      <canvas id="qrCode"></canvas>
      <button onclick="generateQR()" class="buttonstyle">
        Generate colored QR code
      </button>
    </div>
    <script src="https://cdnjs.cloudflare.com/ajax/libs/qrious/4.0.2/qrious.min.js"></script>
Steps to create the CSS file for styling
Follow the following steps to create the CSS file to add styling to the main website
- In the first step assign classes and IDs to each HTML element in the HTML file.
- This will help to uniquely identify the HTML tag and add styling to it.
- In the next step, use the given code to link the HTML file to the CSS file i.e.
<link rel="stylesheet" href="qrcodestyle.css" />
Add this link tag in the HEAD section of the HTML file
The CSS file
.headingone{
  text-align: center;
  color: white;
  box-shadow:  28px 28px 48px #5c5a5a,
             -28px -28px 48px #212121;
  border-radius: 15px;
}

.headingtwo{
  text-align: center;
  color: white;
  box-shadow:  28px 28px 48px #111111,
             -28px -28px 48px #353536;
             border-radius: 15px;
}

*{
  background-color: #343437;
}

.buttonstyle{
  background-color: white;
}

.container{
  margin-left: 15%;
  width: 50%;
  height: 650px;
  padding-left: 17%;
  margin-top: 32px;
  padding-top: 10px;
  background-color: rgb(107, 110, 113);
  border-radius: 67px;
background: linear-gradient(140deg, #343437, #f7f7f7);
box-shadow:  28px 28px 48px #ffffff,
             -28px -28px 48px #343437;
}

.paraone{
  width: 270px;
  height: 25px;
  padding-top: 5px;
  text-align: center;
  border-radius: 5px;
  background-color: #404143;
  font-weight: 900;
  font-size: large;
  background: linear-gradient(115deg, #5a5a5b, #c1baba);
box-shadow:  28px 28px 48px #655c5c,
             -28px -28px 48px #4b4b4d;
}

.paratwo{
  width: 270px;
  height: 25px;
  padding-top: 5px;
  text-align: center;
  border-radius: 5px;
  background-color: #404143;
  font-weight: 900;
  font-size: large;
  border-width: 3px;
  background: linear-gradient(115deg, #5a5a5b, #c1baba);
box-shadow:  28px 28px 48px #655c5c,
             -28px -28px 48px #4b4b4d;
}

.parathree{
  width: 270px;
  height: 25px;
  padding-top: 5px;
  text-align: center;
  border-radius: 5px;
  background-color: #404143;
  font-weight: 900;
  font-size: large;
  border-width: 3px;
  background: linear-gradient(115deg, #5a5a5b, #c1baba);
box-shadow:  28px 28px 48px #655c5c,
             -28px -28px 48px #4b4b4d;
}

.buttonstyle{
  margin-top: 140px;
  width: 220px;
  margin-left: 100px;
  height: 40px;
  border-radius: 20px;
  font-family: 'Times New Roman', Times, serif;
  font-size: large;
  font-weight: bold;
  transition-timing-function: ease-in-out;
  background: linear-gradient(115deg, #5a5a5b, #c1baba);
box-shadow:  28px 28px 48px #221f1f,
             -28px -28px 48px #4b4b4d;
}

.buttonstyle:hover{
  cursor: pointer;
  font-weight: bold;
  transition-duration: 0.5s;
  transform: scale(1.1);
}

#textInput{
  margin-bottom: 10px;
  height: 25px;
  width: 260px;
  background-color: #828386;
  border-radius: 20px;
  border-width: 5px;
  font-size: large;
  font-style: italic;
  padding-left: 10px;
}

#textInput:hover{
  cursor: pointer;
  transition-duration: 0.5s;
  background-color:#434449;
  transform: scale(1.1);
}

#backgroundColor{
  margin-bottom: 10px;
  height: 25px;
  width: 260px;
  background-color: #6f7175;
  border-radius: 20px;
  border-width: 5px;
  padding-left: 10px;
  font-size: large;
  box-shadow:  28px 28px 48px #4c4b4b,
             -28px -28px 48px #4c4c4f;
}

#backgroundColor:hover{
  cursor: pointer;
  transition-duration: 0.5s;
  background-color:#353537;
  transform: scale(1.1);
}

#foregroundColor{
  margin-bottom: 10px;
  height: 25px;
  width: 260px;
  background-color: #b0b3c0;
  border-radius: 20px;
  border-width: 5px;
  padding-left: 10px;
  font-size: large;
}

#foregroundColor:hover{
  cursor: pointer;
  transition-duration: 0.5s;
  background-color:#434449;
  transform: scale(1.1);
}

#qrCode{
  margin-left: 100px;
  transform: scale(2);
box-shadow:  28px 28px 48px #111111,
             -28px -28px 48px #353536;
justify-content: center;
}
Steps to create the JavaScript file
Follow the following steps to create a JavaScript file to make the website functional
- In the first step create a JavaScirpt file named qrcode.js and link the JS file through the HTML file by using the following script tag.
<script src="qrcodej.js"></script>
- In the next step create the script tag inside the body tag of the HTML file only
The JavaScript File
let qr;
(function () {
  qr = new QRious({
    element: document.querySelector("#qrCode"),
  });
})();

const generateQR = () => {
  const textInput = document.querySelector("#textInput").value;
  const backgroundColor = document.querySelector("#backgroundColor").value;
  const foregroundColor = document.querySelector("#foregroundColor").value;
  qr.set({
    value: textInput,
    background: backgroundColor,
    foreground: foregroundColor,
  });
};
- Now create a variable named qr
- Use the above variable to store the QRious object used for customization of the QR code
- Now use the IIFE i.e. immediately invoked function expression to execute the QRious object once the script tag loads completely.
- You use this type of function because the QR code must be generated first before the user should interact with the website.
- The syntax for the IIFE function is (function () {……})();
- Now in the next step introduce the QRious object in the qr variable inside the IIFE.
- Now use querySelector to uniquely identify the canvas tag through its ID or its class name.
- You use the querySelector because it will help to uniquely identify the canvas and load the QRious object in it.
- Now in the next create a new function named generateQR
- Now add the onClick method to the button element in the HTML file to call this function whenever the button is clicked
<button onclick="generateQR()" class="buttonstyle">
Now in the generateQR create 3 variables named textInput, backgroundColor, and foregroudColor i.e.
- const textInput = document.querySelector(“#textInput”).value;
- const backgroundColor = document.querySelector(“#backgroundColor”).value;
- const foregroundColor = document.querySelector(“#foregroundColor”).value;
Use the above code lines to retrieve the value from the respective IDs and store it in those variables by using the querySelector.
Now in the next step introduce the qr.set() method.
The qr method is used to call the QRious library function and set the keyword used to update all properties of the QR code i.e.
- value: textInput,
- background: backgroundColor,
- foreground: foregroundColor,
The properties i.e. value, background, and foreground are the properties of the QRious object which is used to customize the QR code.
So the above represents that the values of the properties are being updated with the value stored in the variable which was declared earlier.
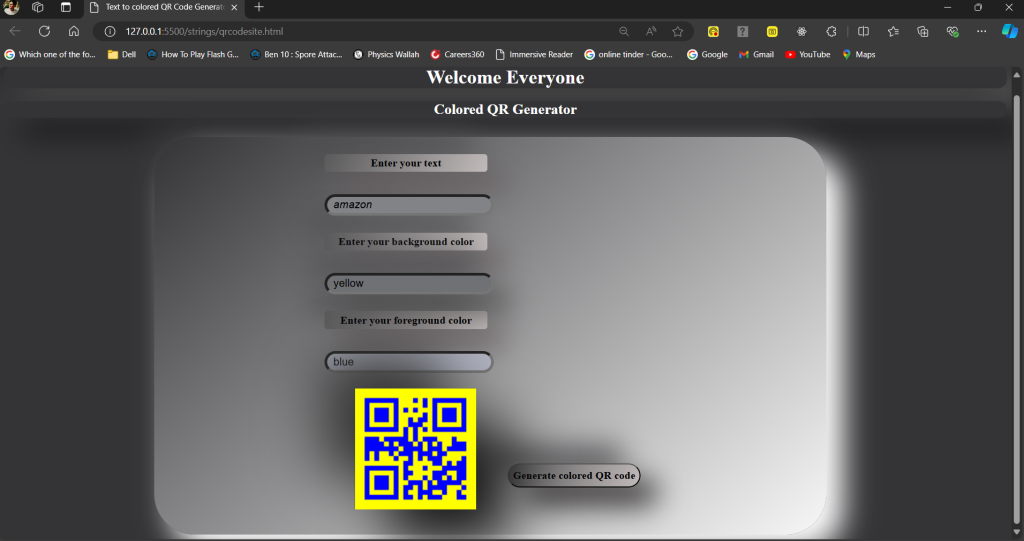
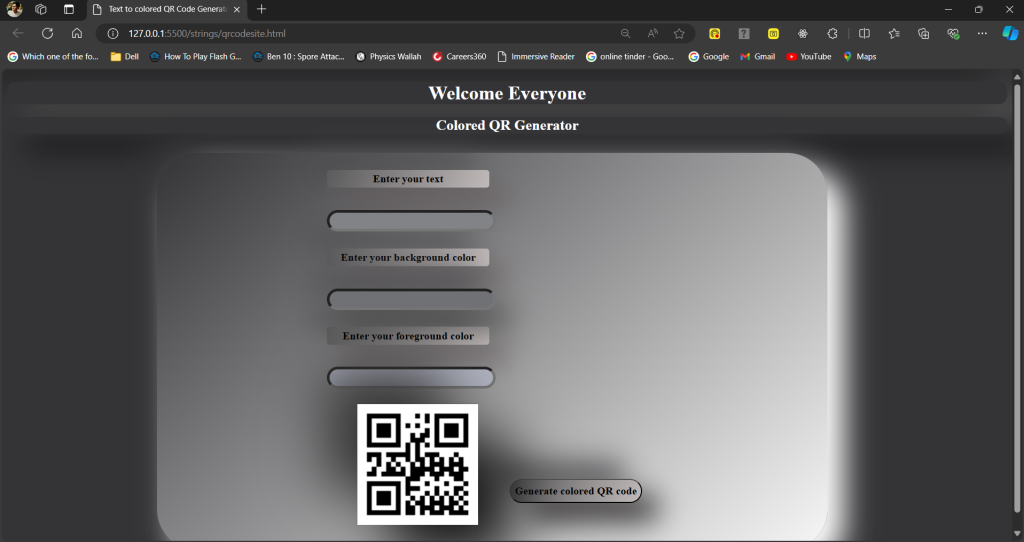
Output
Let us take an example by taking amazon as text input, yellow as background color and blue as foreground color