In this tutorial we’ll see about the TO-DO list which contains the list of values enters by the users .This creates a form with an input field and a button, where the user can enter a task to be added to the to-do list. A To-do list is a simple and effective way to manage tasks with additional features like add and delete functionality.
TO-DO list using Javascript
Here are the key features of a basic To-Do list:
- Task Input: Users can add new tasks by entering text into an input field.
- Task Display: The list displays all added tasks, showing their titles.
1. HTML:
Let’s start with building the HTML structure. The HTML structure of the app will contain three elements: the header, input wrapper, and to-do item lists.
Example code below:
<!DOCTYPE html>
<html lang="en">

<head>
    <title>TO-DO List</title>
    <link rel="stylesheet" type="text/css" href="todo.css">
</head>

<body>
    <div class="todo">
    <h1>TODO List</h1>
    <h2>Items </h2>
    <div id="items"></div>
    <input id="itemInput" type="text" placeholder="Add an Item" />
    <button onclick="addItem()">Add Item</button>
    <script src="todo.js"></script>
    </div>

</body>
</html>
2. CSS:
The CSS code for the application contains styling different components. The components to style contain different containers div, heading h1, input, button.
Example Code below:
body {
    display: flex;
    justify-content: center;
    align-items: center;
    height: 100vh;
    margin: 0;
    background-color: #caf0f8;
}
.todo{
    background-color: #a2d2ff;
    padding: 20px;
    border-radius: 8px;
    box-shadow: 0 0 10px rgba(0, 0, 0, 0.1);
    text-align: center;
    width: 300px;
    border: 10px solid #90e0ef;
}
3. Javascript :
In your JavaScript file handle the following tasks:
- Adding Tasks: When the user clicks the “Add” button, create a new list item and append it to the list.
- Deleting Tasks: Add a close button to each list item.
Javascript Functionality:
- renderItems(): This function dynamically creates and displays the list of tasks. It iterates through the items array and generates the necessary HTML elements (text, buttons, etc.).
- loadItems(): Loads tasks from local storage when the page loads.
- addItems():Adds a new task to the list when the user clicks the “Add” button.
- removeItem():Removes the Items insered in To-Do list.
Example Code below:
let items = [];

const itemsDiv = document.getElementById("items")
const input = document.getElementById("itemInput")
const storageKey = "items";

function renderItems() {
    itemsDiv.innerHTML = null;

    for (const [idx, item] of Object.entries(items)) {
        const container = document.createElement("div")
        container.style.marginBottom = "10px"

        const text = document.createElement("p")
        text.style.display = "inline"
        text.style.marginRight = "10px"
        text.textContent = item;

        const button = document.createElement("button")
        button.textContent = "Delete"
        button.onclick = () => removeItem(idx)

        container.appendChild(text)
        container.appendChild(button)

        itemsDiv.appendChild(container)
    }
}

function loadItems() {
    const oldItems = localStorage.getItem(storageKey)
    if (oldItems) items = JSON.parse(oldItems)
    renderItems()
}

function saveItems() {
    const stringItems = JSON.stringify(items);
    localStorage.setItem(storageKey, stringItems)
}


function addItem() {
    const value = input.value;
    if (!value) {
        alert("You cannot add an empty item")
        return
    }
    items.push(value)
    renderItems()
    input.value = ""
    saveItems()
}

function removeItem(abc) {
    items.splice(abc, 1)
    renderItems()
    saveItems()
}

document.addEventListener("DOMContentLoaded", loadItems)
Conclusion:
Output : 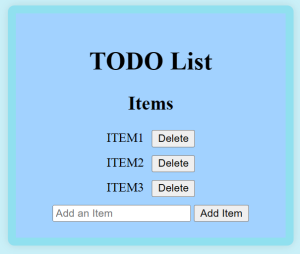
We say the use of TO-DO list which allows list down the values and organise the items. We can use this project for improve organization of tasks which are prioritised.